Carpenter bees, while beneficial to the environment as pollinators, can cause significant damage to wooden structures. These bees bore into wood to create nesting galleries, leaving behind a trail of sawdust-like debris known as frass. Over time, this debris can accumulate, becoming an eyesore and potentially leading to further structural issues. Properly removing carpenter bee debris is essential for maintaining the integrity and appearance of your property. This article will provide a detailed guide on how to effectively remove carpenter bee debris and prevent future accumulations.
Understanding Carpenter Bee Debris
Before tackling the cleanup process, it’s important to understand what carpenter bee debris is and why it’s important to remove it:
- What Is Carpenter Bee Debris?
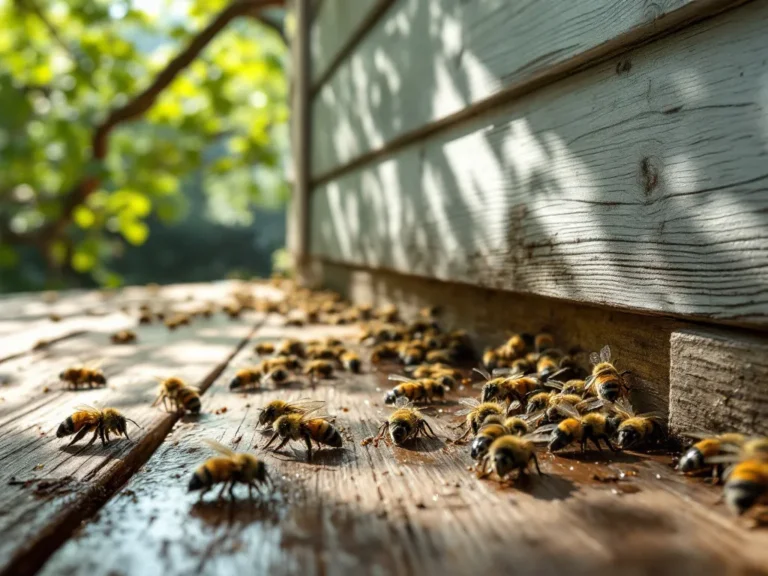
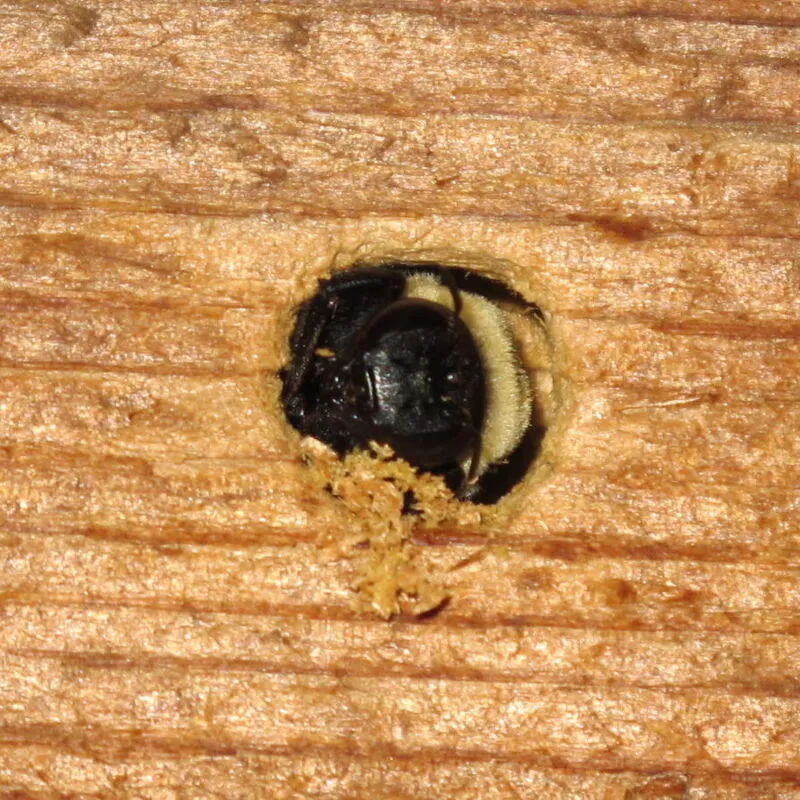
- Frass: The primary type of debris left by carpenter bees is frass, a fine, sawdust-like material that results from the bees boring into wood. This frass is pushed out of the entrance holes and can accumulate on surfaces below.
- Wood Shavings: In addition to frass, larger wood shavings may be present, especially if the infestation is severe or the wood is particularly soft.
- Why Remove Carpenter Bee Debris?
- Aesthetic Concerns: Accumulated frass and wood shavings can detract from the appearance of your property, creating an unsightly mess around the infested area.
- Attraction of Other Pests: Carpenter bee debris can attract other pests, such as ants or termites, that are drawn to the scent of the wood or the remnants of the bees’ activity.
- Health and Safety Risks: In some cases, the accumulation of debris can pose a slip hazard or contribute to respiratory issues if inhaled over time.
Preparing for Debris Removal
Proper preparation is key to effectively removing carpenter bee debris. Here’s what you need to do before getting started:
- Inspect the Area
- Identify Affected Areas: Carefully inspect the area around carpenter bee holes to identify where debris has accumulated. Look for frass and wood shavings on the ground, on ledges, and in crevices.
- Check for Active Bees: Before you begin cleaning, ensure that the area is free of active carpenter bees to avoid getting stung. If you notice any bee activity, it’s best to treat the area with an insecticide first or wait until the bees are less active, typically in the early morning or late evening.
- Gather Necessary Tools and Materials
- Protective Gear: Wear gloves, safety goggles, and a dust mask to protect yourself from inhaling frass and to avoid contact with any chemicals if you plan to use insecticides.
- Cleaning Tools: A vacuum cleaner with a hose attachment, a soft-bristle brush, and a broom are essential tools for removing debris from various surfaces.
- Disinfectant or Cleaning Solution: Use a mild disinfectant or cleaning solution to clean the area after removing the debris to ensure it’s free of any residual contaminants.
Step-by-Step Debris Removal Process
Follow these steps to remove carpenter bee debris effectively:
- Start with the Obvious Debris
- Sweep or Vacuum the Area: Begin by using a vacuum cleaner with a hose attachment to remove the bulk of the frass and wood shavings. Focus on areas directly beneath the carpenter bee holes, as well as any other spots where debris has accumulated.
- Use a Soft-Bristle Brush: For more delicate surfaces, such as windowsills or painted wood, use a soft-bristle brush to gently sweep away debris without damaging the surface.
- Clean Crevices and Hard-to-Reach Areas
- Use a Small Brush or Toothbrush: For crevices, corners, and other hard-to-reach areas, use a small brush or an old toothbrush to dislodge and remove debris. Pay special attention to cracks and joints where frass may have settled.
- Compressed Air: If necessary, use compressed air to blow out debris from tight spaces. This can be particularly useful for removing frass from between boards or inside small holes.
- Dispose of the Debris Safely
- Bag and Seal the Debris: Place the collected debris in a plastic bag, seal it tightly, and dispose of it in the trash. This will prevent any remaining carpenter bee remnants or potential pests from spreading.
- Clean the Area Thoroughly
- Wipe Down Surfaces: After removing the debris, wipe down the affected areas with a damp cloth or sponge soaked in a mild disinfectant or cleaning solution. This will help eliminate any remaining dust and ensure the area is clean.
- Inspect for Residual Debris: Double-check the area for any missed debris or remnants, especially in less visible spots.
Preventing Future Carpenter Bee Debris
To minimize the accumulation of carpenter bee debris in the future, consider these preventative measures:
- Treat and Seal Carpenter Bee Holes
- Apply Insecticidal Dust: If you suspect carpenter bees are still active, treat the holes with insecticidal dust to eliminate the bees before sealing the holes.
- Seal the Holes: After treating, seal the carpenter bee holes with wood filler or caulk to prevent further infestations and reduce the likelihood of additional debris.
- Paint or Stain Exposed Wood
- Protect Wood Surfaces: Applying paint or stain to exposed wood surfaces can deter carpenter bees from boring into the wood, thus reducing the production of debris.
- Regular Maintenance and Inspection
- Routine Checks: Regularly inspect your property for signs of new carpenter bee activity and remove any debris promptly. Early detection can prevent larger infestations and make debris management easier.
- Keep the Area Clean: Maintain the cleanliness of the area around your wooden structures to make it less attractive to carpenter bees and other pests.
- Install Physical Barriers
- Protect Vulnerable Areas: Install screens, metal flashing, or other barriers over vulnerable areas where carpenter bees are likely to nest. This will help prevent them from accessing the wood and producing debris.
Conclusion
Removing carpenter bee debris is an essential part of maintaining the health and appearance of your wooden structures. By following the steps outlined in this guide, you can effectively clean up frass and wood shavings, reducing the risk of further damage and preventing other pests from being attracted to your property. Regular maintenance and proactive measures, such as treating and sealing holes, will help keep your home free of carpenter bee debris in the future.
Resources
- Carpenter Bee Control Products: Find a range of insecticides, wood fillers, and preventative solutions at DoMyOwn.
- Home Maintenance Tips: Visit This Old House for expert advice on maintaining your home and preventing pest damage.
- Pest Control Services: Locate professional pest control services through HomeAdvisor to assist with severe carpenter bee infestations.
FAQs
- What is carpenter bee debris?
- Carpenter bee debris, also known as frass, is a sawdust-like material produced when carpenter bees bore into wood. It may also include larger wood shavings.
- Why is it important to remove carpenter bee debris?
- Removing carpenter bee debris helps maintain the appearance of your property, prevents the attraction of other pests, and reduces health and safety risks.
- How often should I clean up carpenter bee debris?
- It’s best to clean up carpenter bee debris as soon as you notice it to prevent accumulation and minimize the risk of further damage.
- Can I prevent carpenter bee debris from forming in the first place?
- Yes, by treating and sealing carpenter bee holes, painting or staining wood surfaces, and installing physical barriers, you can reduce the likelihood of carpenter bee activity and debris production.
- What tools do I need to remove carpenter bee debris?
- Essential tools include a vacuum cleaner with a hose attachment, a soft-bristle brush, a small brush or toothbrush for crevices, and a mild cleaning solution.