Cedar is a popular choice for outdoor structures due to its natural beauty and durability. However, its soft texture makes it an attractive target for carpenter bees, which can cause significant damage over time. One of the most effective ways to protect cedar from these wood-boring insects is by applying a protective coat of paint. This article will guide you through the steps to properly paint cedar, ensuring it remains protected from carpenter bee damage for years to come.
Why Paint Protects Cedar from Carpenter Bees
Carpenter bees are naturally drawn to bare, untreated wood, making cedar an easy target. Painting cedar creates a physical barrier that deters bees from boring into the wood. Here’s why paint is effective:
- Seals the Wood: Paint forms a protective layer that seals the wood’s surface, making it harder for carpenter bees to penetrate.
- Unattractive Surface: Carpenter bees prefer to drill into untreated or weathered wood. A painted surface is less appealing to them, reducing the likelihood of infestation.
- Added Protection: Paint can also protect cedar from moisture and UV damage, which can weaken the wood and make it more susceptible to carpenter bees.
Preparing Cedar for Painting
Proper preparation is crucial to ensure the paint adheres well and provides long-lasting protection. Follow these steps to prepare cedar for painting:
- Clean the Surface
- Remove Dirt and Debris: Use a soft brush or a pressure washer on a low setting to clean the cedar. Remove any dirt, dust, and debris that could interfere with paint adhesion.
- Check for Mold or Mildew: If you notice any mold or mildew, clean the wood with a mixture of water and mild detergent or a specialized wood cleaner.
- Sand the Wood
- Smooth the Surface: Lightly sand the cedar with fine-grit sandpaper (180-220 grit) to smooth the surface and remove any rough spots. This will help the paint adhere better.
- Remove Dust: After sanding, wipe the wood down with a damp cloth or tack cloth to remove any sanding dust.
- Repair Any Damage
- Fill Holes and Cracks: If there are any existing carpenter bee holes or cracks in the wood, fill them with exterior wood filler. Once the filler is dry, sand it smooth to match the surrounding wood.
Choosing the Right Paint and Primer
Selecting the right type of paint and primer is essential for protecting cedar from carpenter bees. Here’s what to look for:
- Primer
- Use an Exterior-Grade Primer: Choose a high-quality, exterior-grade primer that’s designed for use on wood. A primer helps seal the wood, improving paint adhesion and providing an extra layer of protection.
- Consider Stain-Blocking Properties: If your cedar has knots or other imperfections, use a stain-blocking primer to prevent discoloration from bleeding through the paint.
- Paint
- Use Exterior Latex or Acrylic Paint: Opt for a high-quality exterior latex or acrylic paint. These paints are durable, flexible, and resistant to cracking, peeling, and fading, making them ideal for protecting cedar from the elements and carpenter bees.
- Choose the Right Sheen: A semi-gloss or satin finish is recommended for cedar. These finishes provide a smooth surface that’s less attractive to carpenter bees and easier to clean.
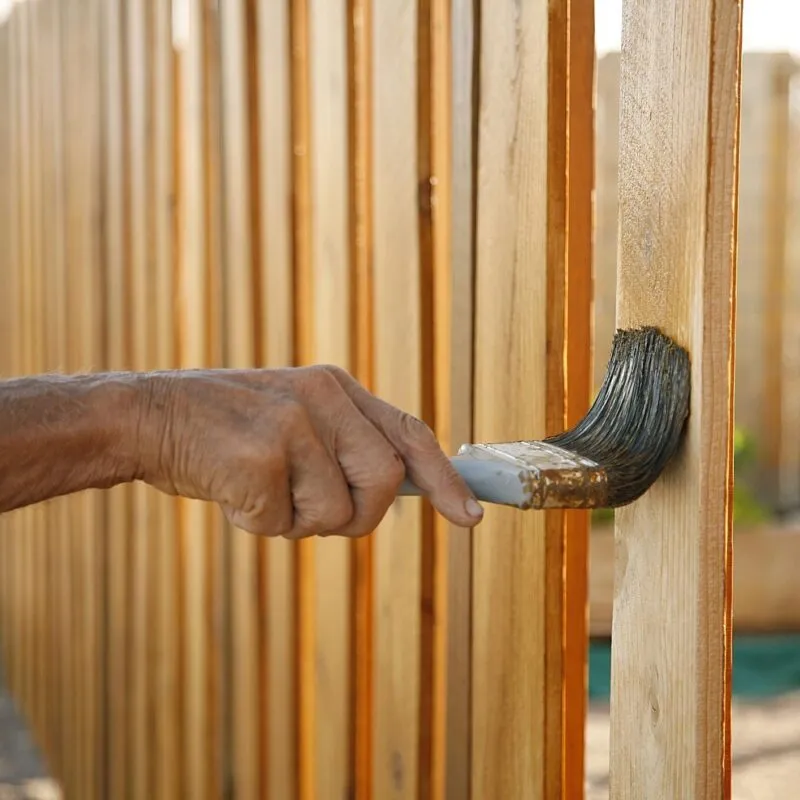
Painting Cedar to Protect It from Carpenter Bees
Once the cedar is prepped and you have the right materials, it’s time to paint. Follow these steps to ensure a smooth, even coat that will protect your wood:
- Apply the Primer
- Brush or Roll On: Use a paintbrush or roller to apply a thin, even coat of primer to the cedar. Be sure to cover all surfaces, including edges and ends, where carpenter bees are most likely to bore.
- Let It Dry: Allow the primer to dry completely according to the manufacturer’s instructions, usually 24 hours.
- Apply the Paint
- First Coat: After the primer is dry, apply the first coat of paint. Use long, even strokes with a brush or roller to ensure full coverage.
- Let It Dry: Allow the first coat to dry completely, typically 4-6 hours, depending on the weather conditions and paint type.
- Second Coat: Apply a second coat of paint for added durability and protection. This coat should provide a smooth, uniform finish.
- Inspect and Touch Up
- Check for Missed Spots: After the paint has dried, inspect the cedar for any missed spots or areas that need touch-up.
- Apply a Final Sealant (Optional): For extra protection, especially in high-exposure areas, consider applying a clear exterior sealant over the paint. This will further protect the cedar from moisture and carpenter bees.
Maintaining Painted Cedar
To keep your cedar protected from carpenter bees, it’s important to maintain the painted surface:
- Regular Inspections: Check your cedar structures regularly for signs of paint wear, chipping, or new carpenter bee activity. Early detection allows for quick touch-ups before significant damage occurs.
- Touch-Up Paint as Needed: If you notice any areas where the paint is chipping or peeling, promptly touch them up to maintain the protective barrier.
- Reapply Paint Every Few Years: Depending on your climate and the exposure of the cedar to the elements, you may need to repaint every 5-7 years to ensure continued protection.
Conclusion
Painting cedar is an effective way to protect it from carpenter bee damage. By choosing the right materials and following proper preparation and application techniques, you can create a durable barrier that deters these wood-boring pests and keeps your cedar structures looking beautiful for years to come. Regular maintenance and touch-ups will ensure that your cedar remains protected, allowing you to enjoy its natural beauty without the worry of carpenter bee damage.
Resources
- Paint and Primer Selection: Visit Sherwin-Williams for expert advice on selecting the right paint and primer for your cedar projects.
- Cedar Maintenance Tips: The Western Red Cedar Lumber Association offers additional resources on caring for and maintaining cedar wood.
- Carpenter Bee Control: Learn more about preventing and treating carpenter bee infestations at PestWorld.
FAQs
- Why do carpenter bees target cedar?
- Carpenter bees are attracted to the soft, untreated wood of cedar, which makes it easy for them to bore into and create nests.
- What type of paint is best for cedar?
- High-quality exterior latex or acrylic paint with a semi-gloss or satin finish is ideal for protecting cedar from carpenter bees.
- Do I need to use a primer on cedar before painting?
- Yes, using an exterior-grade primer helps seal the wood, improves paint adhesion, and provides an additional layer of protection against carpenter bees.
- How often should I repaint cedar to keep it protected?
- Cedar should be repainted every 5-7 years, or as needed, depending on the wear and exposure to the elements.
- Can I use a clear sealant instead of paint to protect cedar from carpenter bees?
- While a clear sealant can provide some protection, paint offers a more durable and effective barrier against carpenter bees.